This by Swedish Paint Co. Alco:


 Here's what you'll need:
 I was pretty bummed that it was missing part of it's leg.
  I was debating whether to buy it because I wasn't sure I could fake that piece. I opened up the drawer to test the glides and to my surprise...I found the missing piece!
  After some glue and clamp action I was ready to sand and paint. I decided to do the pink thing. I was wanting to try something I'd seen in a magazine that someone did with their kitchen cabinets. They painted the base coat and then just free-handed some white around the edges. It looked really cute so I thought I would try it out on something small and inexpensive.
  I like how this little piece turned out, but I'm not sure I would feel comfortable attempting it on a large scale project just yet. Maybe if I had better detail brushes.
 Perfect!! I got home and started painting right away. Well, right after I fed the kids and took them to school. I just barely had enough white paint, but that's ok because I wanted a really distressed look anyway. The kind of look where the paint is actually peeling away instead of sanded down.
  The way to do that is to be a lazy painter. Don't sand down the original paint, don't wait for the paint to dry in between coats and don't wait until it's dry to sand it. The paint really peels off well. I brushed polyurethane stain over the top after I had sanded the edges. I think I'm going to love having this shelf in my entry way. I'll post a picture after I come up with something to decorate it with!


 I made a peg board to use for towels and robes and another little one for hand towels. I put up some crown moulding we had lying around in the basement and added a little seating area with magazines.
 An old shelf that we had fit well over the doorframe and I bought the candle holder at D.I. for $2.
  I decided to hang the magnet board that I had for sale on Poppy Ginger because it matched so well. I'll buy some magnetic hooks and hang my necklaces. O.K. so I really only have one necklace, but maybe when my kids are older and not trying to strangle me I'll get more. It's always nice to be prepared right?? I thought it was a success just because my hubby doesn't hate it-which I was almost certain he would because he can't stand wallpaper. I'm contemplating painting the cabinets white and buying a cushy white bathroom rug....I should also clean the tub, but where is the fun in that?? I'd also like to welcome Brittany as a follower. Thanks for the nice comments and feel free to send me any fun ideas that you have as well.

 I sometimes feel it's a little too dark and wanted to add something white there to brighten things up a bit. I've been considering making some white frames and hanging them. I almost started that project this morning when I came across a big white door that I had bought for this exact space. I completely forgot about it! Yahoo!! I don't have to make frames today!! I found this door at IKEA. For those of you who don't know IKEA has an "as is" section right before you check out of the store. They often sell doors and big pieces of wood for practically nothing. I bought this door for $3.
 I liked that it took up a lot of room on the wall and the white did help, but it still looked lacking. I tried a wreath in the center.
 An improvement, but it still needed something. I decided to stick some little mirrors that I had mod podged paper on a few months ago. I just taped them on the door. I'll leave them there for now to see if I still like them there this afternoon. I might hang them with twine just so I can change decorations easily. Fun!!


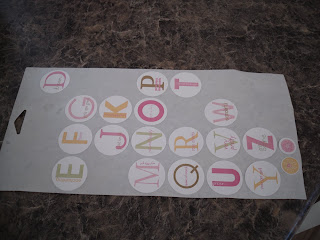 I bought them when Pebbles in My Pocket was having a mass sale and I got a few for 10 cents each. I decided to peel the edge on the outside of the sticker and use it as a stencil. After placing it on the drawer front I painted a thin red coat to seal it so it would be less likely to leak.
 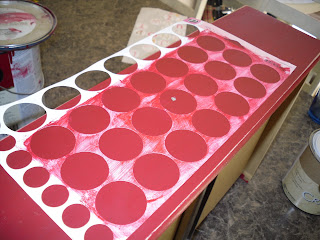 I painted the white and pealed away.
 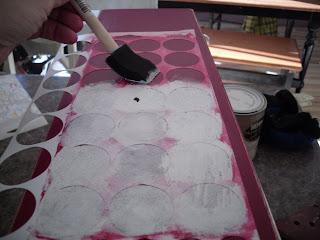 There was still a tiny bit of leakage so I just took a toothpick and smoothed out the edges. I love how it turned out!!
 My Sis-in-law Sarah and I had both decided to make magnet boards for our kids for Christmas. She actually finished hers before Christmas while sadly mine is still sitting in the wood shop without a frame. Sarah used Mod Podge to line her frame with fabric(I had no idea Mod Podge worked with fabric! Way cool!). It turned out so cute. I would post a pic, but I haven't asked her permission yet. I was getting antsy this morning(not to be confused with ansy which I found out this morning was another word for horny((glad I looked that one up)). My kids are home sick and I was in the mood to make something. I have an old magnet board that used to be in my kitchen and so I decided to spice it up a bit. I painted pink stripes and then added alphabet stickers to the top and glued a wooden flower to the bottom.
 Sarah and I were debating whether to cover our magnet boards with fabric. It's a cute look, but you have to use stronger magnets and you may not be able to focus on the pictures the kids are hanging up. Since this was kind of a trial run magnet board I decided to cover it. A word of caution: after I covered the sheet metal with fabric it was VERY difficult to get it to fit back in the frame. I would suggest a thin fabric if you are buying a magnet board from the store. I just taped the fabric tightly on the back. It seems to be holding well. I bought the cute circle boxes in the kitchen department at IKEA.
  The backs have a very strong magnet so they hold tightly. I just cut out cute paper and put stickers to label them. I think it will be fun for the kids to keep little nicknacks like movie stubs and such. Hopefully this will hold me over until we actually get our bigger one built! Thanks for the motivation Sarah!!


 A resting place for my children. A safe haven from this crazy world we live in. I want to yell less and cherish more. I love to create and decorate, but I also would like to remember that what happens within the walls of my home is way more important than what happens on the walls. I hope you all have a wonderful year and enjoy this wonderful life!!


