Showing posts with label Refashioned Furniture. Show all posts

Tuesday, June 11, 2013

A few Summer projects~

I probably won't be an amazing blogger throughout the summertime, 
but I'm excited to share a few projects that I've been working on.

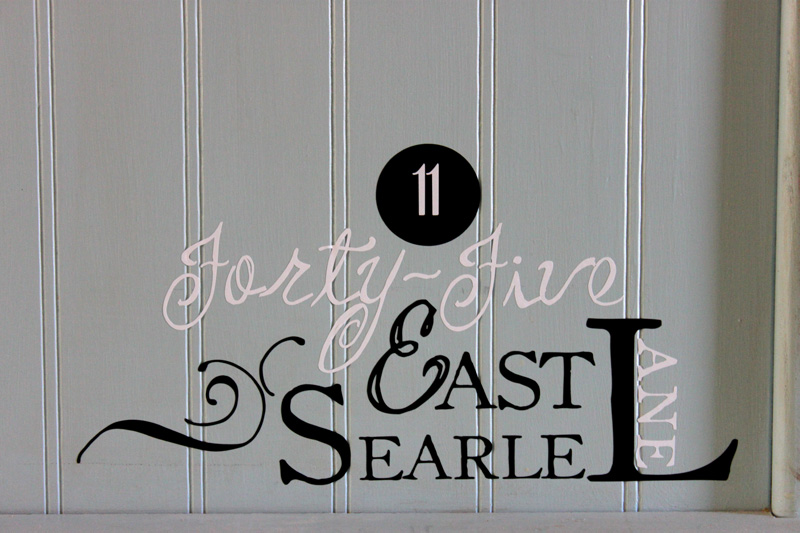
I've been playing around with vinyl, trying to find a cute design for our address. 
I didn't really like the size for my door, so I stuck it on our entry bench.

This beautiful secretary was given to me by my Mother-in-law. She found it in San Fran way back when The Joe was a little boy. I love that she kept it for all of these years and carried it with her through all of her many moves. I started painting it last year and then got majorly burnt out, so it sat...and sat..and sat in my storage.  


 Here it is, finished and functional in our office. It's such a great catchall with all of those little cubbies.


Now that Summer is in full force, I also wanted to brighten up the living room shelf with some happy decor.  I totally forgot that I had this lemonade sign! Sometimes it's nice having a crappy memory because you're always discovering new fun things around the house! Lol.  


I hope you're enjoying the sunshine!

Tuesday, October 16, 2012

Wooden pallet kitchen display

How to make a kitchen display from a wooden pallet:

Step one:
Get yourself a pallet.

 If you can manage to find a free one like I did... SCORE!  Mine was in the empty lot next to my house.  I figure if someone is going to leave their crap in an empty lot for 2 months, it's up for grabs.  


Measure and Cut!

Cut a couple of thin scraps of wood to give the shelves a lip.  The wood pieces don't have to be the same size, or look very nice.  In fact, it's better if they look awful, then they can fit right in with a pallet that's been sitting in an empty lot for 2 months.


Nail!

 Tack the strips of wood onto the edge of the "shelves".  I let mine hang over the edge because I wanted to have more room for plates and decor.


 Paint!
Not the "Uggh, I hate painting" kind of painting. The "Yay! I don't have to be careful or accurate or good" kind of painting.


Accessorize!

I knew I wanted to hang an apron from the corner, so I added a hook. I think it'd also be cute to add a bunch of shaker pegs to the top shelf and hang mugs. I might do that later...I'm currently out of pegs.


Hang it!

I just stuck a bunch of  long screws right through the boards and straight into the wall. Ideally this would be a 2 man job, but if one of the "men" is impatient and can't wait until the other man gets home, then just use your elasti-girl, super strength powers.....You know what I'm talking about.

*Pro-tip: Set the level on the shelf of the pallet, rather than the top. It's more important for your decor to look straight and not be sliding off, then it is for the top of the pallet to be straight.  

*Pro-tip: Use the word "Pro-tip" when you are explaining something. It makes you sound like you know what you are talking about.  


 Enjoy!

Admire your new addition to the kitchen and pat yourself on the back for a job well done.


Tuesday, May 1, 2012

Turquoise pedestal table~

A friend of mine was cleaning out her garage and offered to give me a pedestal table and chairs.
Super nice! Especially since they were already primed:) 


This was the perfect opportunity for me to fill my craving for turquoise.
The chairs must have been painted black and then primed white which made it really easy to get the layered distressed look that I love with just a little bit of sanding.


I started sanding by hand, but then got lazy and just bumped it with an electric sander.


I do love the color, but I also wanted to add some white for contrast.


The Joe didn't love it at first glance, but the color quickly grew on him
...or maybe he was just playing the nice hubby card. He's pretty sweet like that.


The idea for the vinyl stemmed from a quote that I read from Pres. Hinckley.
He said,"The trick is to enjoy life. Don't wish away your day waiting for better ones ahead."

I love that!!! 

Life doesn't have to be perfect for us to enjoy it
and we don't have to be perfect to be happy.


Tuesday, September 27, 2011

Repurposing a cabinet door into a headboard shelf~


I bought this cabinet door from the "as-is" department at IKEA. I picked it up for $3(love those deals!!) Initially it had 2 additional squares that I chopped off so I could use it for the top of a coffee table. We used it for a while until Emmie gave us an old door that we wanted to use instead.

The cabinet door  has been hanging out in my garage for a couple of months so I thought I'd try and turn it into a shelf/headboard for my daughter's room.  

It's a pretty easy project if you have the right tools!

I set an 8'' mdf board next to the door and played around with drawing sides until I figured out one that I liked.  I cut it out with a bandsaw and traced a matching one for the other side.


I chopped the edges of a 10'' board at a 45 degree angle with a miter and routed the top side.


Before I put it all together, I drilled hanging holes in the top side of the cabinet door.


I put wood glue on all of the edges and tacked them into place with a pneumatic nail gun.


Here's a shot of the previous headboard.


And here's the headboard shelf hanging above her bed. 


I love how much it brightens and cheers up the room! 
Hopefully Liv will like it too!  

Tuesday, August 16, 2011

Robin's egg blue hutch~

Finding a sweet deal on a hutch is not an easy task. I've been keeping my eyes peeled for a while now, searching classifieds and consignment stores. Not that I necessarily need another one, but I just really like them and so when I see one for sale, I can't help but check out the price...which is usually a couple hundred dollars..


While we were out shopping garage sales last Saturday I saw this little beauty. Base included, it was only $25. To top it off, the people selling it actually delivered it to my front door for free. HELLO.


First things first, I had to say goodbye to the faux glass door panels. Ick. 


I traced the panels and cut out identical pieces of bead board to replace them.


I painted the whole thing robin's egg blue, sanded the edges and rubbed brown paint into the beads.


The base was completely filled with spider egg sacks. 
Another ick....BIG HUGE ICK, but it was still worth it.


For now it's sitting in my front room. 
I might move it, but probably not very often.
 This is one that I can't muscle around by myself. It's a heavy beast.


I don't mind the original hardware. 
I might change the knobs if I find something that I love, but I'm definitely keeping the handles. 
I like the dark contrast.


What do you think? Do you like bright colored eye-catching furniture,


or do you prefer neutral colors that will easily work with a lot of different color schemes?


I can definitely see the benefit of neutral colors.
It really makes it soooo much easier to change things up, but once in a while I just crave color!

Tuesday, July 26, 2011

Super cool old door turned into a coffee table~

My incredibly nice neighbor and friend Emmie asked me if I'd like to have an old door that she found as she was cleaning out of  her family's garage. I was WAY excited of course because I have been searching for a good old hardwood door for some time now.  I wanted to turn it into a coffee table for the front room. It's big and will work for puzzles, games and make a good foot rest for a lot of people. Plus I just think it looks cool:)  

I had the door sitting in the garage for a week trying to figure out a good way to make a base. I have a few different styles of legs that I've salvaged from other tables, but the styles didn't seem to match the door. When it came down to it, I decided I wanted something similar to the base that was already on my other coffee table...only longer so it wouldn't look weird.  I was thinking about ways to re-create it when I noticed that the base actually comes apart and the middle board is just a 2X4 with a few cuts in the end of it.  SA-WEET!!  I could just replace it with a longer 2X4!!! Way less work than I was anticipating, especially since The Joe made the cuts on the 2X4 for me:) Thanks Love.


I unscrewed the top and took the base apart.


Painted the new, longer 2X4 black to match and put it back together.


This is a pic with the smaller base. My son and Nephews helped me take the hinges off of the door. They love taking things apart. 

I wanted to add a little bit of a personal touch so I created a vinyl stencil.


I sanded off quite a bit of the paint to age it.


I LOVE the hardware on the door!!


I'm so excited and The Joe has mentioned a few times how much he loves it as well. 


Thanks so much for the door Emmie!! You are the best!


Tuesday, February 1, 2011

Tea Party Table~

I had considered changing this little roundy into a side table for the front room.
A place to hold a lamp, maybe a magazine....


 Until I saw how much my girls loved it.
They immediately threw a blanket over the top to use it as their own special table.


Obviously this  table was meant for something much more important.


Accent tables in the living room don't invoke smiles such as these.