
 I saw the idea on Jamie and Kelli's blog called The Junk Box. I like the look of theirs with the yellow pipe cleaner, but we didn't have that on hand so we just decorated the fingers with glitter. I'm thinking about joining the anti-glitter coalition because of how much glitter I keep finding in my house even after a week, but they had a blast so it's worth it. My son even loved it. We just used a boyish print paper for his. For another way to make super duper cute and kid friendly felt flowers check out Hannah's post HERE.
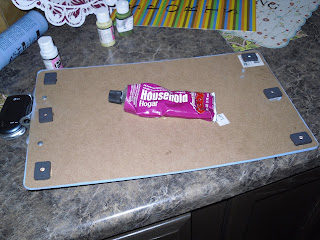
I would have to give the clipboard a big two thumbs up. It forces me to do something really interactive with my kids even when I don't really feel like it, which is unfortunately just what I need.
I decided I'd like to give you an opportunity to share any of your creative ideas on Tuesdays. It can be something you've made, a room you've decorated or a fun thing you've done with your kids. Really anything under the sun. They only give you a few options for what to call it and still be free, so I picked Cats on Tuesdays. Ha ha ha. Please don't post pics of your cats, we just need to stretch that into Creative Cat's Tuesday( I don't know if that's actually legal, I may be really irritating the cat community. We'll see if anyone complains). I'll see if I can get this to work. Today is kind of a test run. I would love to see what you are doing! If you don't have a blog and would like to have a project shown just email me a picture with a description and I will post it for you! If you don't have anything to share this week get crafting and be ready next Tuesday!!

 I would have had it finished if I hadn't had problems with my stapler and tried to fix it by myself. After an hour of trying to figure it out, I almost had it and then all of the pieces went flying!!!
 Not so awesome!! Funny enough I was trying to tack the material down with those tiny little nails that come with picture hanging hardware. I ran out about half way through the first cushion, so I just tucked the material around the other cushion and pressed it into place. I made a coordinating pillow. I thought it looked kind of cute wrapped in a sheer scarfy thingy that my sister gave to me. I got the fabric at Broadbends on a recommendation from Heather. I am a big fan of that store for material!! If you live around here, it's on 100 w. In Lehi. Very cute fabric choices!! I am so happy with the way that this turned out!!! I love it and I owe it all to this stuff!!
 Have you ever used the stain gels?? This is the first time that I've tried them and I LOVE it!! It is so much easier to antique something and it's not so messy! The gel helps it to color really quickly and easily!! Seriously, if you like the antique look you have got to try this stuff!! I got mine at Robert's for $1.27. After painting it(like 5 times, white takes SO many dang coats).

 Easy as pie! I loved this little bench so much that I rearranged my front room around it!! Of course I was up until 2 am because that gave me the darn rearranging bug which just seems to grow exponentially anytime I start. I was tired, but happy!
 I usually take a bit of time to inspect pieces, see if they have any broken parts or whatever-not this time. I nearly jumped a few aisles to snatch it up. I didn't even look at the price. I just love it!!! It was $25 which in my opinion was well worth it...I mean, can you really put a price tag on true love?? I guess you can because if it was any more than that I probably would have had to step back and reconsider. I have really been wanting to re-do a bench for sometime now. Plus I get to do a little reupholstering which is especially fun when it's a simple seat cover. So, this is what I'm going to spend the next couple of days working on. I still haven't figured out what I want to do with it. This is going to sound really cheesy, but as I am working on something I like to get a feel for what it wants to look like...ok so that may sound a bit psycho, so I'll put it another way. I just think that pieces of furniture will look better if the paint job matches the style and design of the furniture itself, and it's fun to try and figure that out. My youngest ones napped when I got home so I was able to get an hour of sanding in. I've even got a war wound from the sander!!
 This better turn out cute because I've shed actual blood for it!! I'll let you know when it's done!
 I bought a couple and hung them above my kitchen window. It's an inexpensive way to nip my pot rack cravings and it doesn't take up much space. What's nice about them is that they go right over the top of the curtain rod, so I can still close the curtain behind them if it gets too sunny.
 Also above windows in most homes there is a header... which means you don't have to use drywall anchors because you are guaranteed to hit wood-SWEET!! So, if a pot rack is on your "dream home" checklist, try IKEA's bathroom department. $7.99. They also have some towel racks that could double as pot racks. I almost went with one of those until I remember that I have zero wall space to put one. The have one that has 4 different rods so you could also stack your big pots on the top!


 I went to Robert's Craft and picked out some really springy paper and some French Blue paint.
 I used Mod Podge to create a spring scene on the lampshade and after sanding and painting the magazine stand I added some bright blue and green paper.


 They are probably used for mailboxes or something...I decided to use them and make a place for my kidlets to display their artwork. I also decided to use some pink cardboard letters and some clothes pins.

 After the glue had dried, I painted everything a light green. It was a little bright so I also sanded the edges and rubbed a dark stain to help age it a bit. After everything was nice and dry I randomly glued the letters and numbers on.
 I love the new addition to our loft!! And want to hear something cool? I was lucky enough to hit two studs when I hung it up and I didn't use a stud finder!! That never happens!

 So cute! I also found one of my dad riding a huge bike as a kid and also one of him playing the accordion with an adorable expression.

 I was thinking that I would make some frames, but when I went downstairs the chop saw was gone!! Joe is helping a neighbor frame his basement. I guess no frame making for me. I still wanted to get them done so I ended up just using paint as a frame. At first I was using painters tape, but the tape peels off some of the paper matte, so I just used the edge of another matte and that worked great.
 It really gives the feel of a framed picture, especially if you don't put them up in a spot where people are going to see them up close...Hey you can't beat three bucks!!


 Seriously....just get rid of almost everything... tupperware for instance...use the buddy system. If it doesn't have a partner get rid of it.


